Mind Map View — Help
Transform your monday.com board into an interactive mind map with automatic bidirectional sync.
1. Getting Started
Adding Mind Map View to a board
- Open any monday.com board
- Click the + button next to your existing views (Table, Kanban, etc.)
- Search for "Mind Map View"
- Click to add it — your board instantly appears as a mind map
First launch
On your first visit, a guided tutorial automatically walks you through the basics in 5 quick steps. You can replay it anytime from the ⋯ menu → Replay tutorial.
How sync works
Mind Map View syncs automatically with your monday.com board in both directions:
- Mind map → Board: Creating, renaming, or deleting nodes in the map updates your board instantly.
- Board → Mind map: Changes made by teammates in the board table appear in your map within seconds.
No "Refresh" or "Push" buttons needed. Your data stays in monday.com — Mind Map View has no external servers or storage.
2. Permissions
When you install Mind Map View, monday.com will ask you to approve the following permissions:
| Permission | Why it's needed |
|---|---|
boards:read | Read your board's groups, items, and subitems to build the mind map |
boards:write | Create, rename, move, and delete items directly from the mind map |
users:read | Display names and avatars of assigned people on nodes |
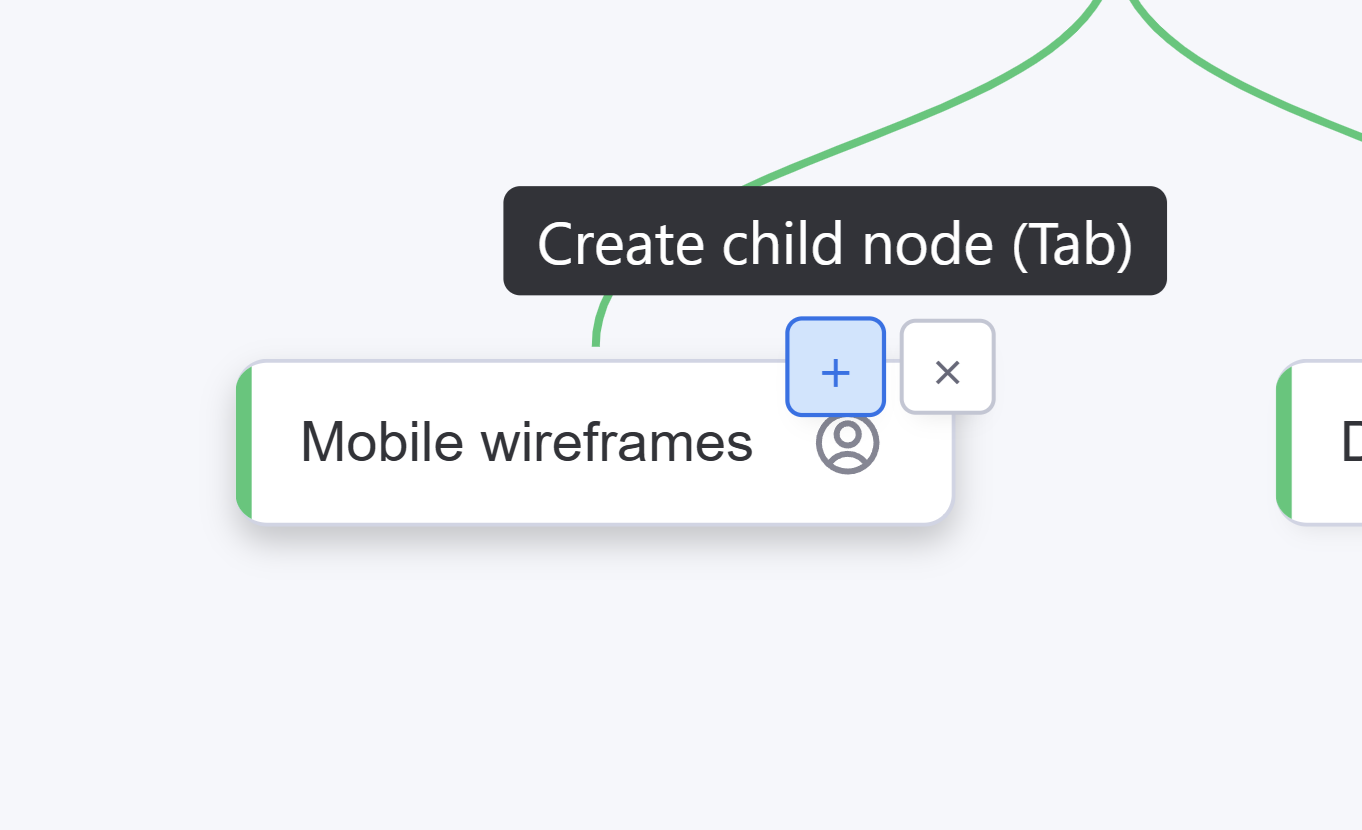
3. Creating Nodes
Select any node in the map, then:
| Action | Method | What happens |
|---|---|---|
| Create a child node | Tab or click the + button on the node | A new node appears below the selected one, ready to type |
| Create a sibling node | Enter | A new node appears next to the selected one, at the same level |
The + button appears when you hover over a node — click it to quickly add a child without using the keyboard.
New nodes are automatically created as the appropriate monday.com entity: Groups (under the board), Items (under groups), or Subitems (under items).
4. Editing & Deleting
Renaming a node
- Double-click on any node, or
- Select a node and press Space
Type the new name, then press Enter to confirm or Escape to cancel. The name syncs to your monday.com board automatically.
Deleting a node
Select a node and:
- Press Delete or Backspace, or
- Click the × button that appears on hover
The node and all its children are removed from both the map and your monday.com board.
5. Navigating
Use arrow keys to move between nodes:
| Key | Navigates to |
|---|---|
| ↑ Up | Parent node |
| ↓ Down | First child node |
| ← Left | Previous sibling |
| → Right | Next sibling |
Press f to zoom the map to fit your entire board in view.
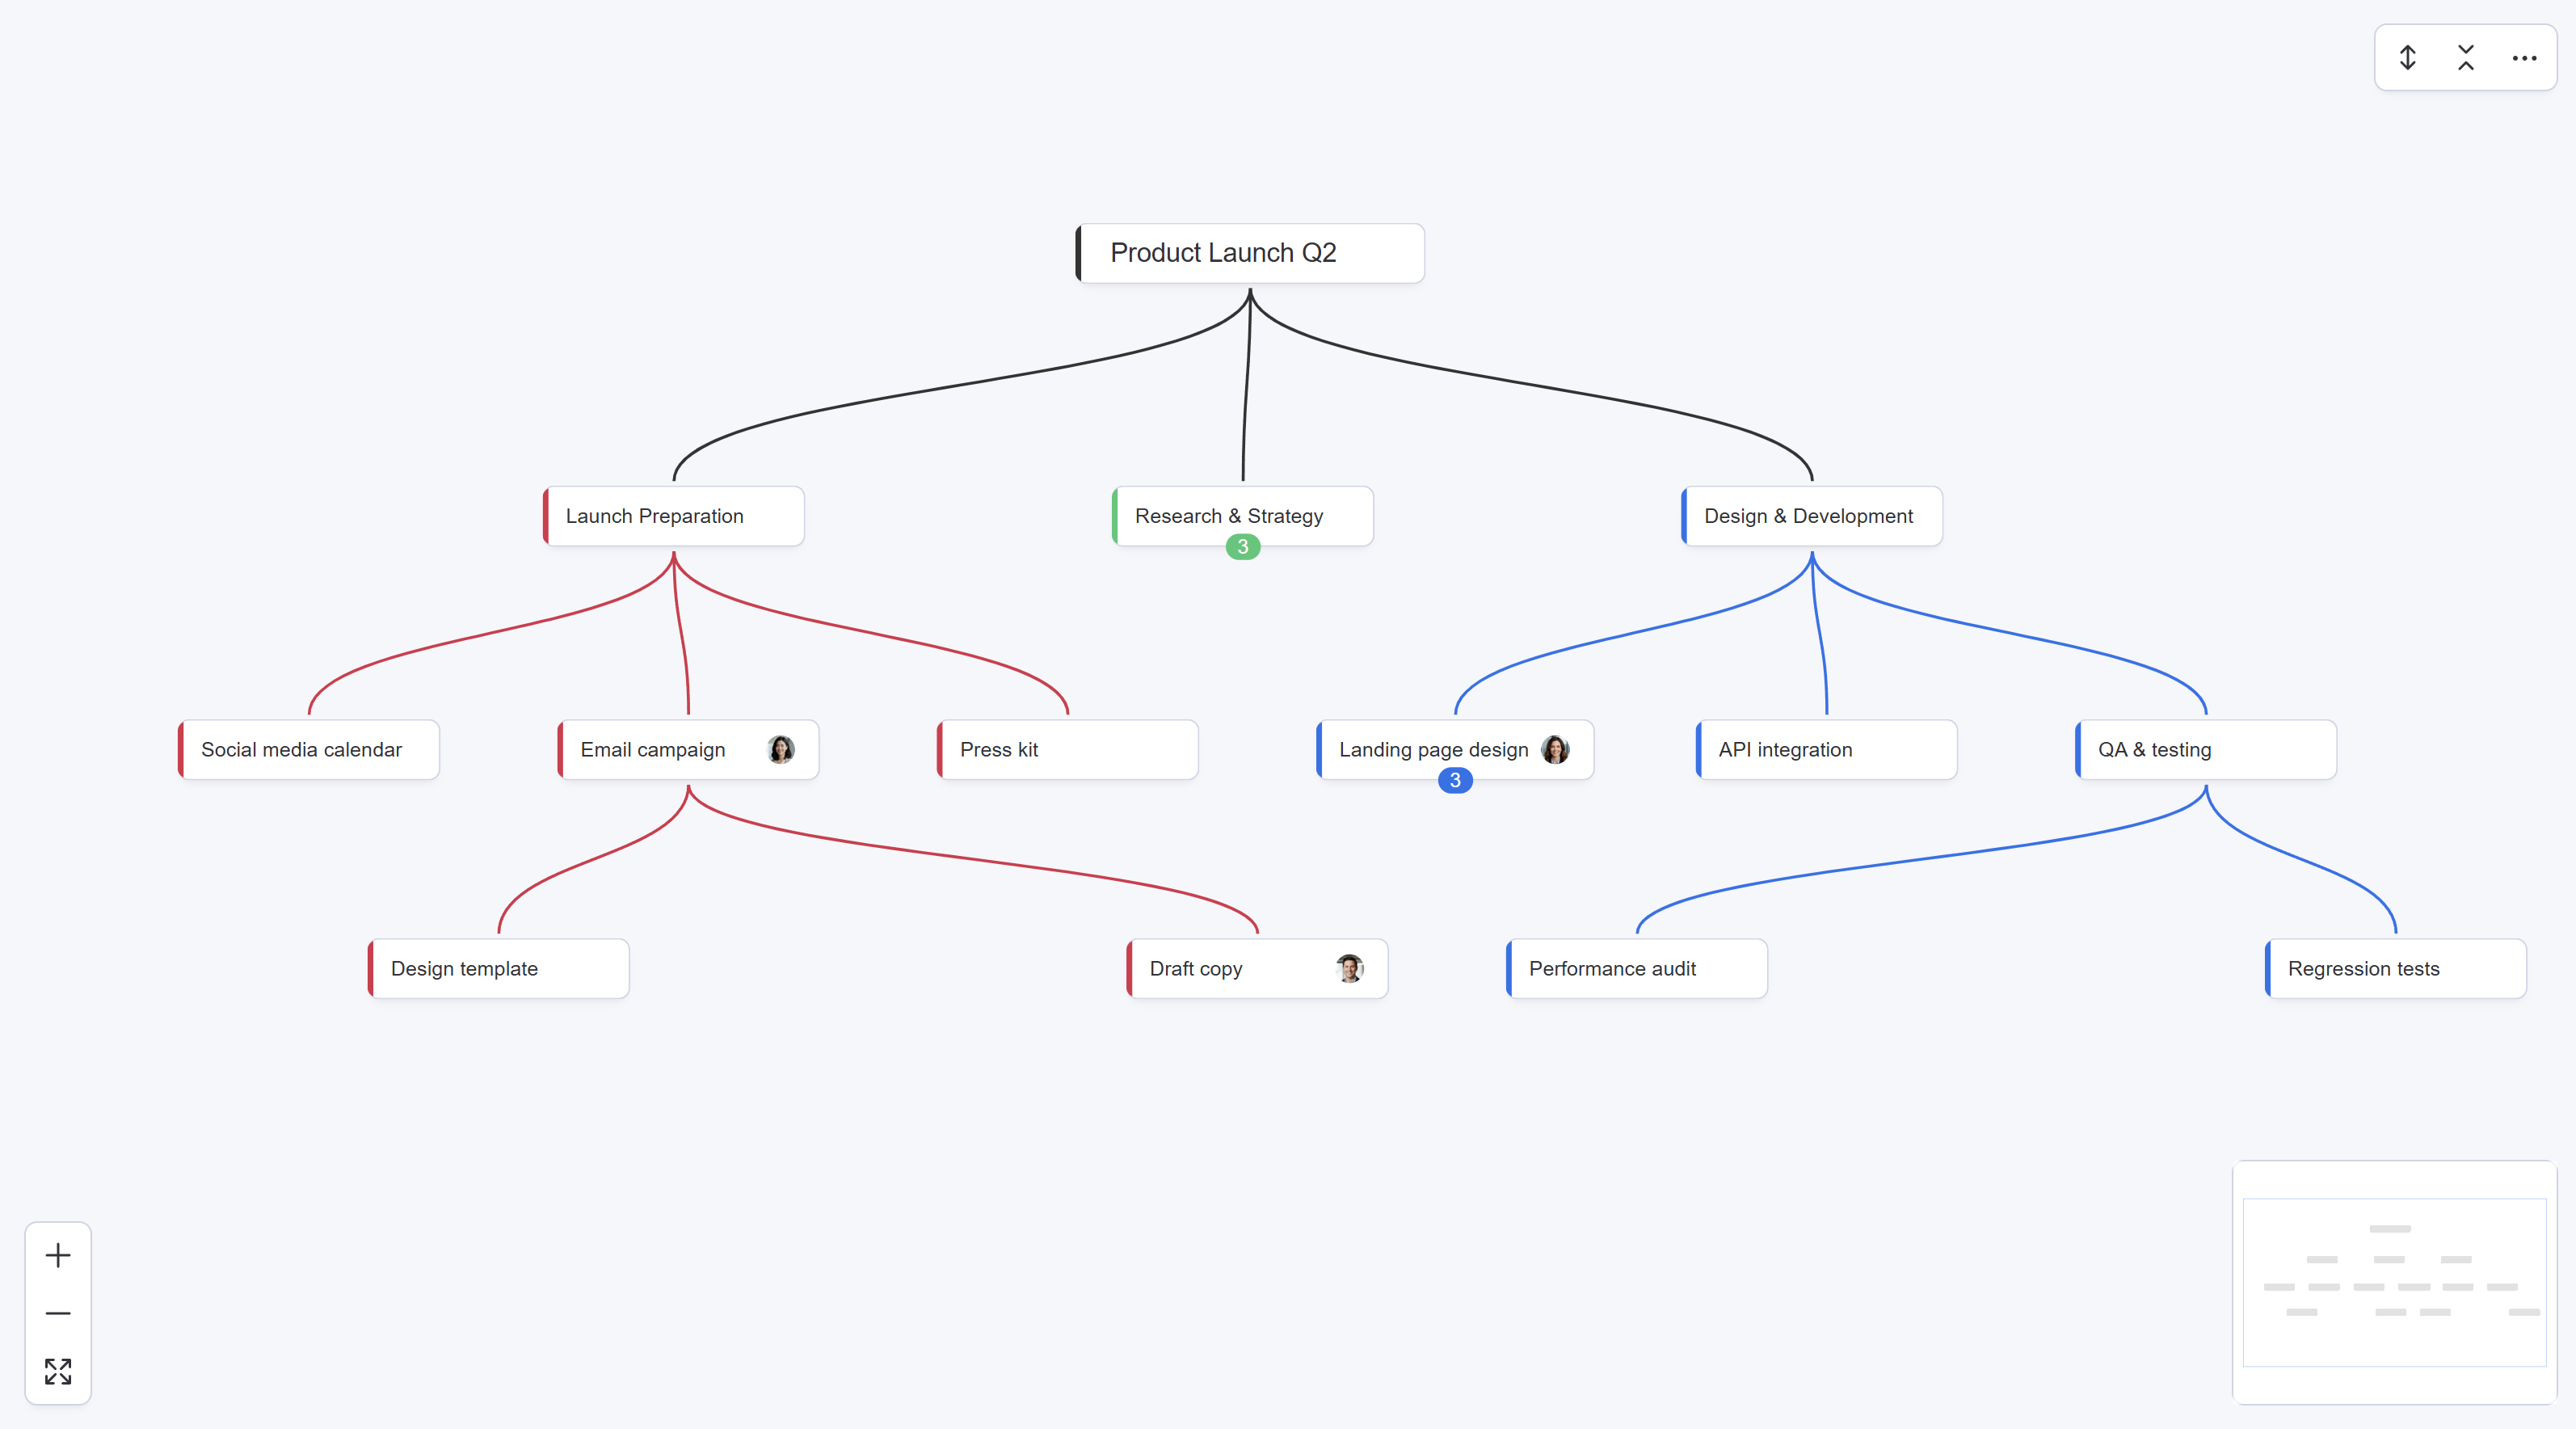
6. Organizing Your Map
Collapse & Expand
- Select a node and press c to toggle collapse/expand
- Collapsed nodes show a badge with the number of hidden children
- Use the toolbar buttons to Expand All or Collapse All at once
Navigating down (↓) into a collapsed node automatically expands it.
Auto-layout
Mind Map View uses an automatic layout algorithm that keeps your map clean and readable. The layout is consistent for all team members — everyone sees the same structure.
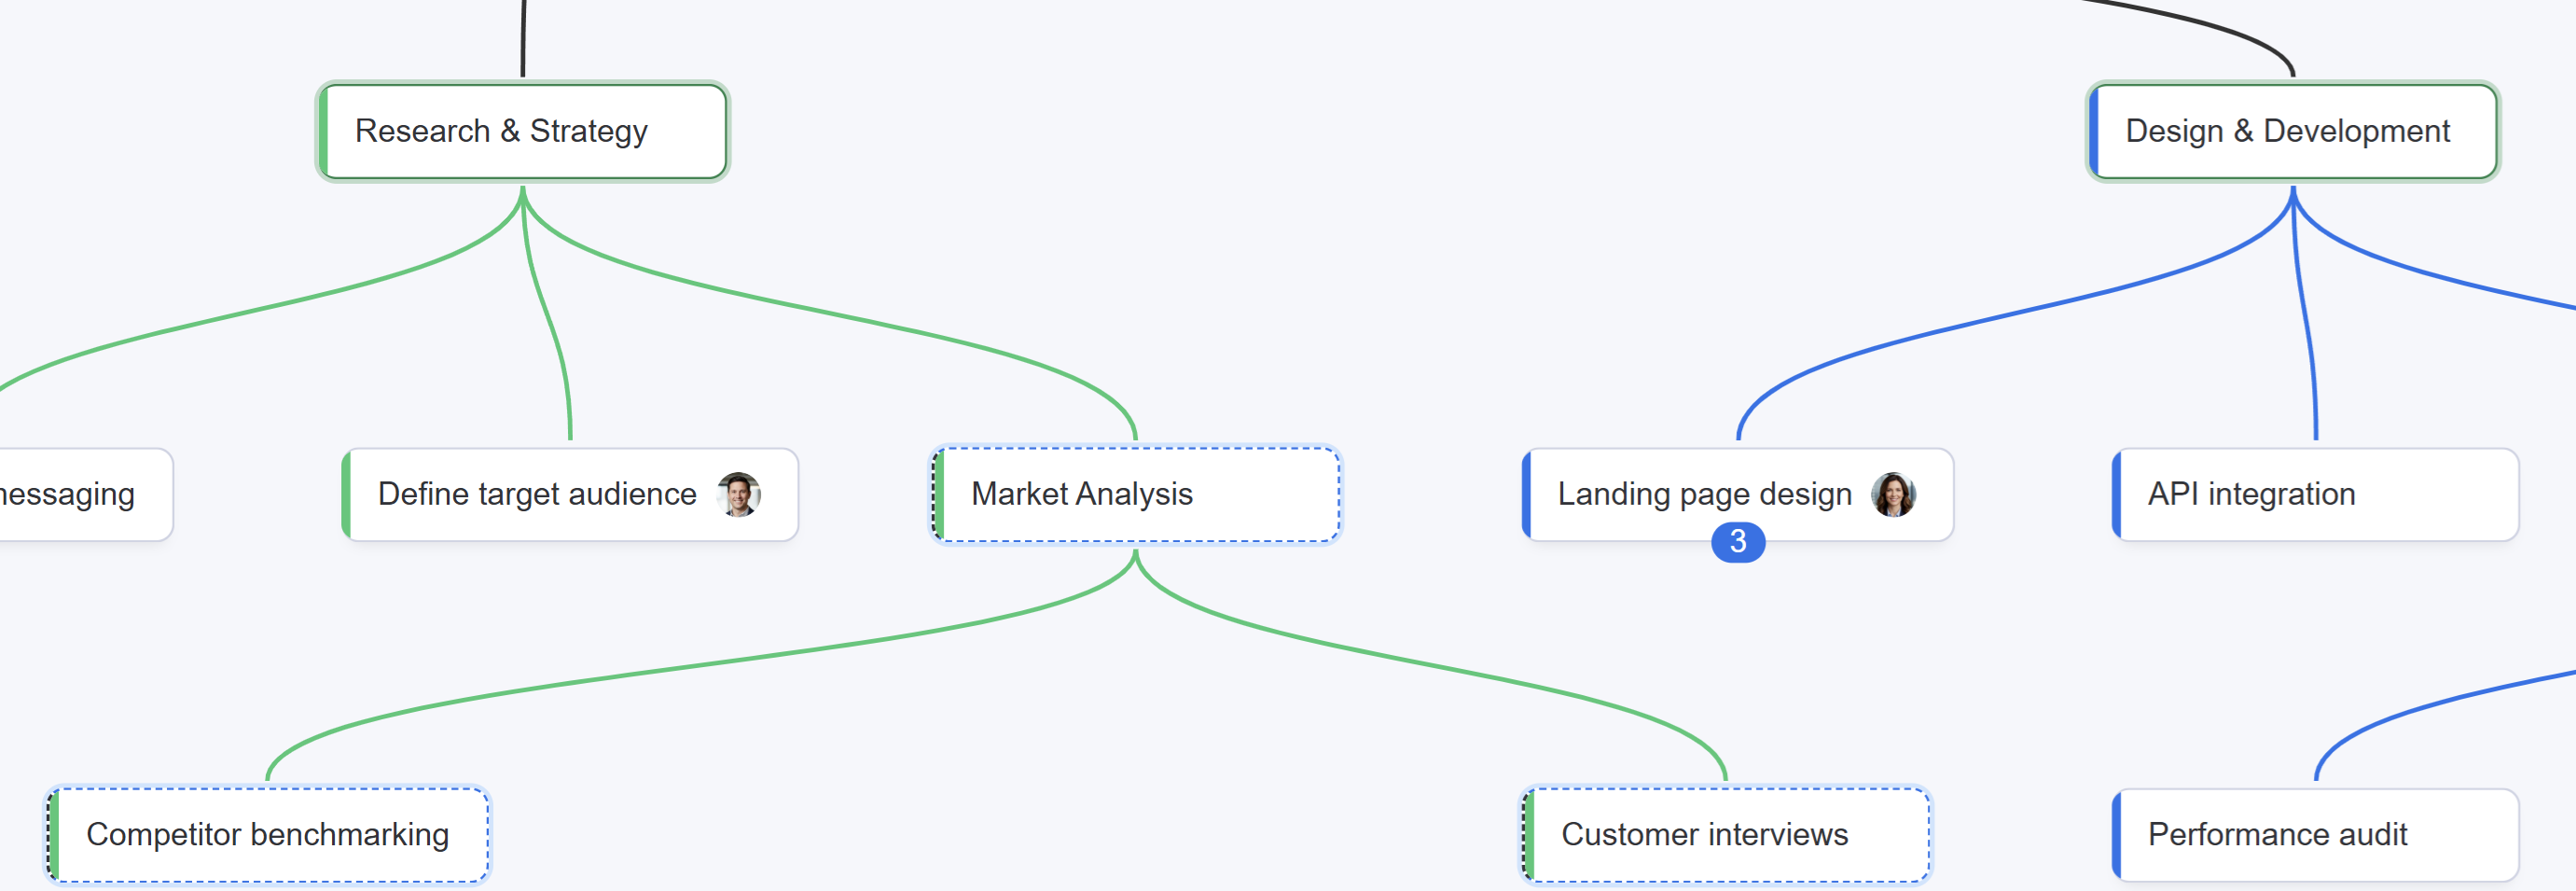
7. Moving & Copying Branches
Moving a branch
| Method | How |
|---|---|
| Keyboard | Select a node → Ctrl+X → navigate to target → Ctrl+V |
| Drag-and-drop | Drag a node and drop it onto a valid target |
The cut node appears with a dashed blue border. Valid drop targets highlight in green. A confirmation dialog appears before the move is executed.
Copying a branch
| Method | How |
|---|---|
| Keyboard | Select a node → Ctrl+C → navigate to target → Ctrl+V |
| Ctrl+Drag | Hold Ctrl while dragging a node onto a target |
Unlike move, copy keeps the original in place and can be pasted multiple times. Press Escape to cancel.
8. Assigning People
Items and subitems can show assigned people directly on the map:
- Hover over an item node to reveal the person assignment button
- Click to open the person picker — search and toggle assignees
- Assigned people appear as avatar icons below the node label
- Changes sync with your monday.com board's person column automatically
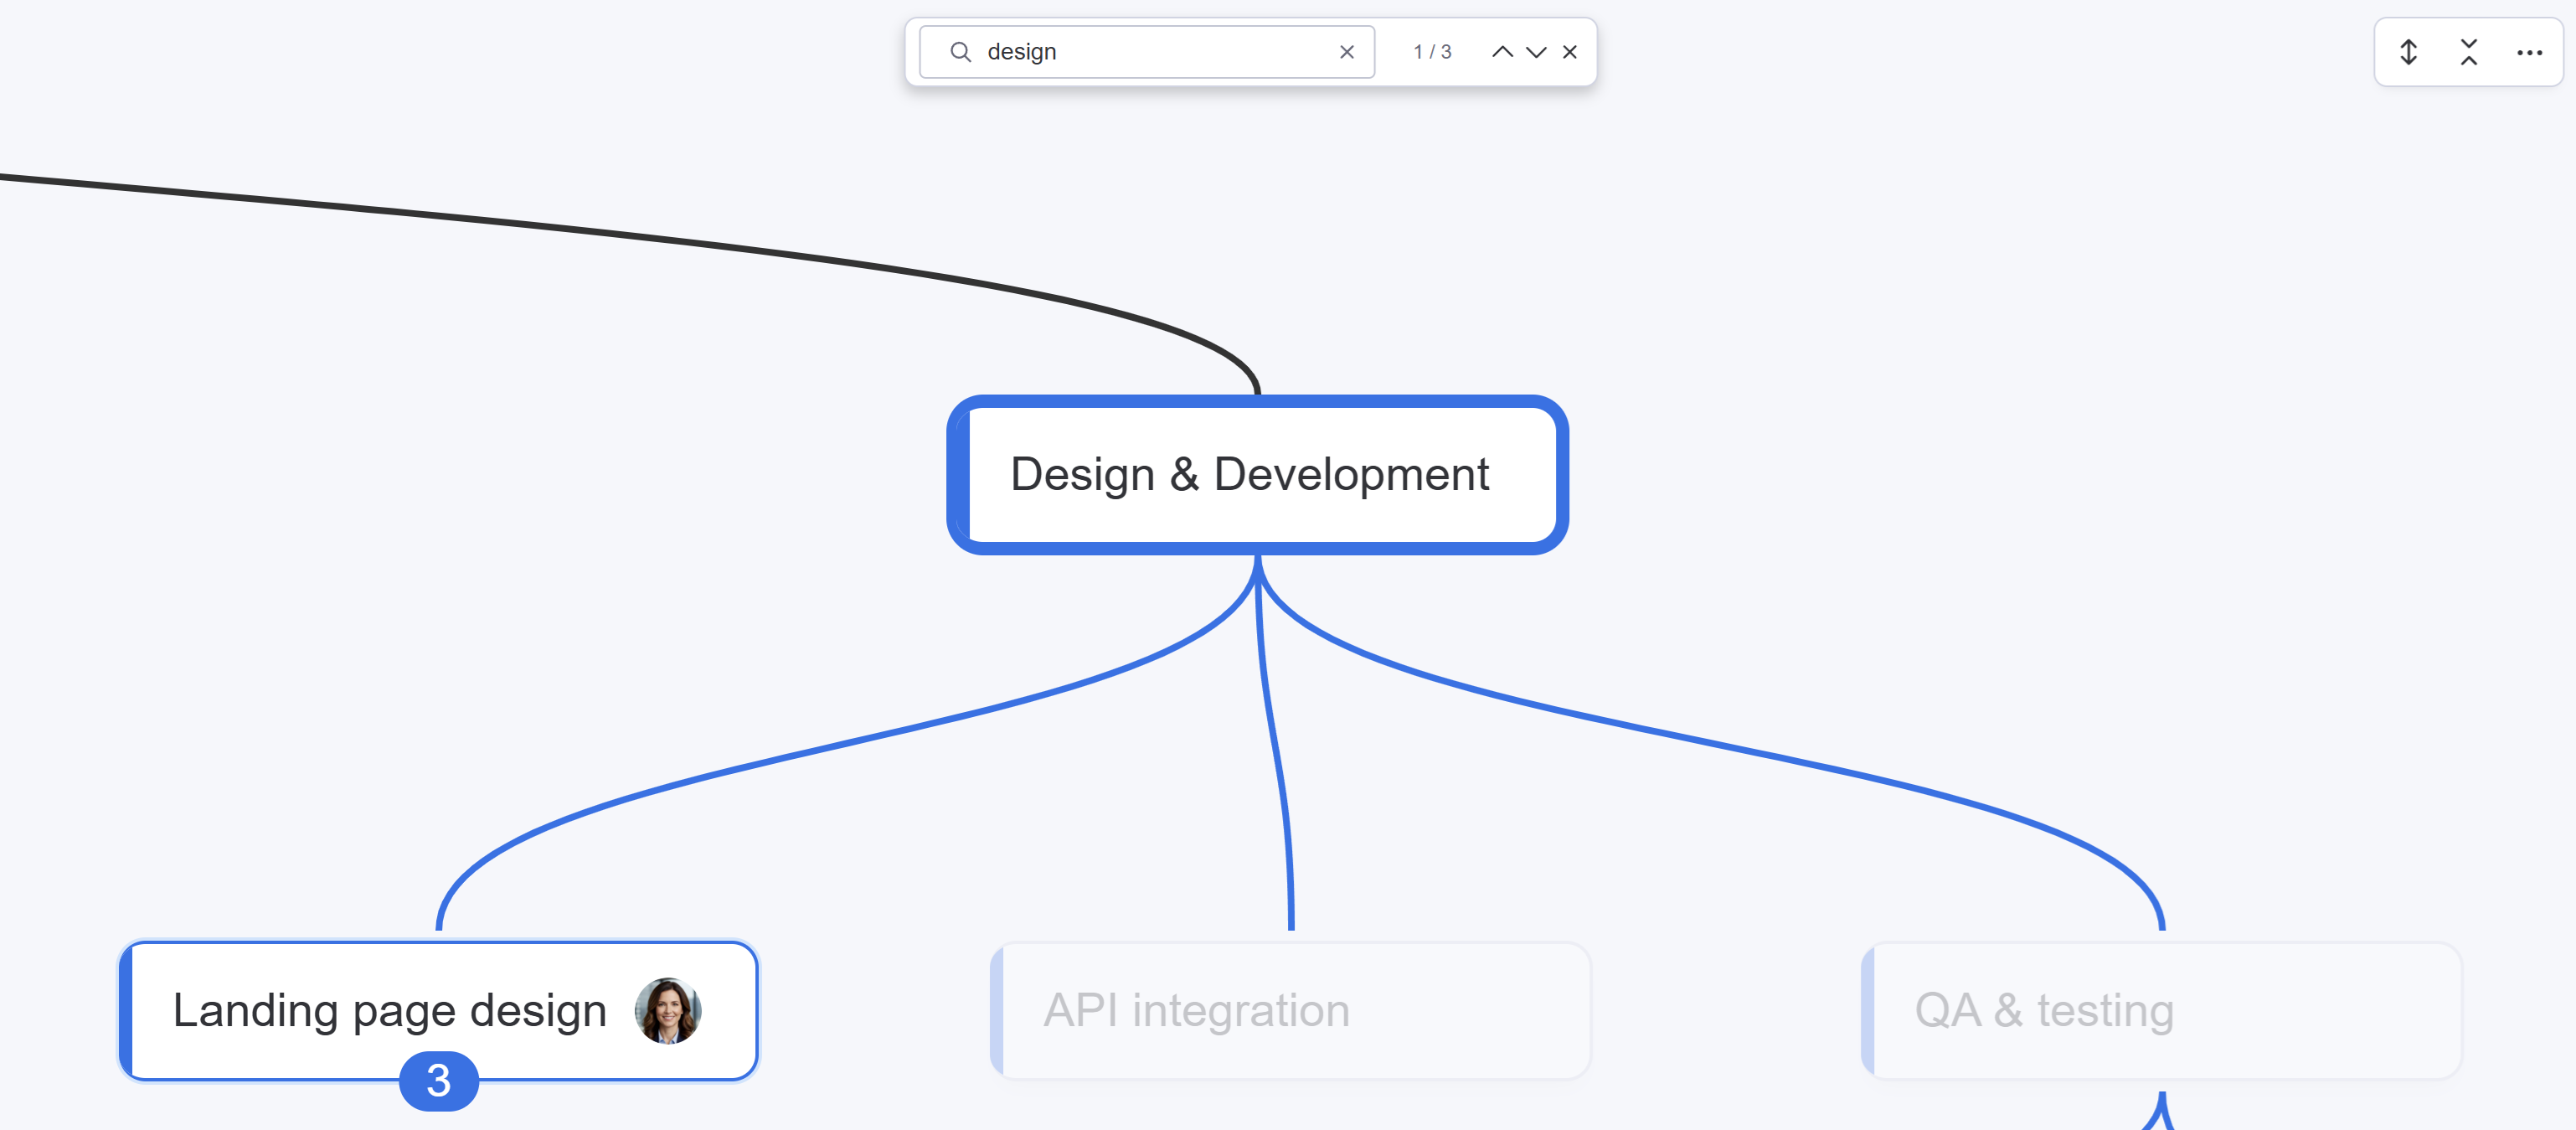
9. Searching
Press Ctrl+F to open the search panel. Type to find nodes by name:
- Matching nodes are highlighted; non-matching nodes are dimmed
- A counter shows "N of M matches"
- Press Enter to cycle to the next match, Shift+Enter for previous
- Collapsed branches auto-expand if they contain a match
10. All Keyboard Shortcuts
Press ? anytime to see this list in the app.
| Shortcut | Action | Context |
|---|---|---|
| Tab | Create child node | Node selected |
| Enter | Create sibling node | Node selected |
| Delete / Backspace | Delete node | Node selected (not root) |
| Space | Edit node name | Node selected |
| Escape | Cancel / deselect | Any |
| Double-click | Edit node name | On a node |
| ↑ ↓ ← → | Navigate between nodes | Node selected |
| c | Collapse / expand branch | Node selected |
| f | Fit view (zoom to fit all) | Any |
| Ctrl+X | Cut node (for move) | Node selected |
| Ctrl+C | Copy node | Node selected |
| Ctrl+V | Paste (move or copy) | Node selected |
| Ctrl+F | Search / find | Any |
| ? | Show shortcuts dialog | Any |
| Ctrl+Shift+L | Open Debug Panel | Any |
| Ctrl+Drag | Copy via drag-and-drop | On a node |
| Drag | Move via drag-and-drop | On a node |
11. Pricing
| Feature | Free | Pro ($5/seat/mo) |
|---|---|---|
| Board limit | 1 board per account | Unlimited |
| Mind map with bidirectional sync | ✓ | ✓ |
| Create, rename, delete nodes | ✓ | ✓ |
| Move & copy branches | ✓ | ✓ |
| Person assignment | ✓ | ✓ |
| Search, collapse, keyboard shortcuts | ✓ | ✓ |
| 14-day Pro trial | ✓ | — |
Annual billing: $4/seat/month ($48/year per seat — save 20%).
The Free plan includes all features on one board. Upgrade anytime from the app to unlock unlimited boards.
How the Free plan board is assigned
Your Free board is automatically assigned to the first board where you open Mind Map View. All features work fully on that board. If that board is deleted, the next board where you open Mind Map View becomes your new Free board.
12. Support
Need help? You can reach us through the app or directly:
- In-app menu: Click the ⋯ button (top-right) for quick access to:
- Replay tutorial
- Request a feature
- Report a bug
- Debug logs (only share these if requested by our support team during troubleshooting)
Request a feature
Have an idea that would make Mind Map View better for your workflow? We'd love to hear it. Your feedback directly shapes our roadmap — many of our best features started as user suggestions.
Report a bug
Something not working as expected? We want to know about it. Every bug report helps us make Mind Map View more reliable for everyone. Don't hesitate — no issue is too small, and our team reads every report.
Debug Panel & Logs

If our support team asks you to share debug logs, here's how:
- Open the Debug Panel with Ctrl+Shift+L (or via the ⋯ menu).
- If asked, change the log level to DEBUG or TRACE using the dropdown in the panel. This temporarily captures more detail (resets automatically after 15 minutes).
- Reproduce the issue — perform the actions that triggered the problem.
- Click Export JSON in the Debug Panel to download a log file.
- Attach the downloaded file to your bug report or email it to hello@sorobu.io.